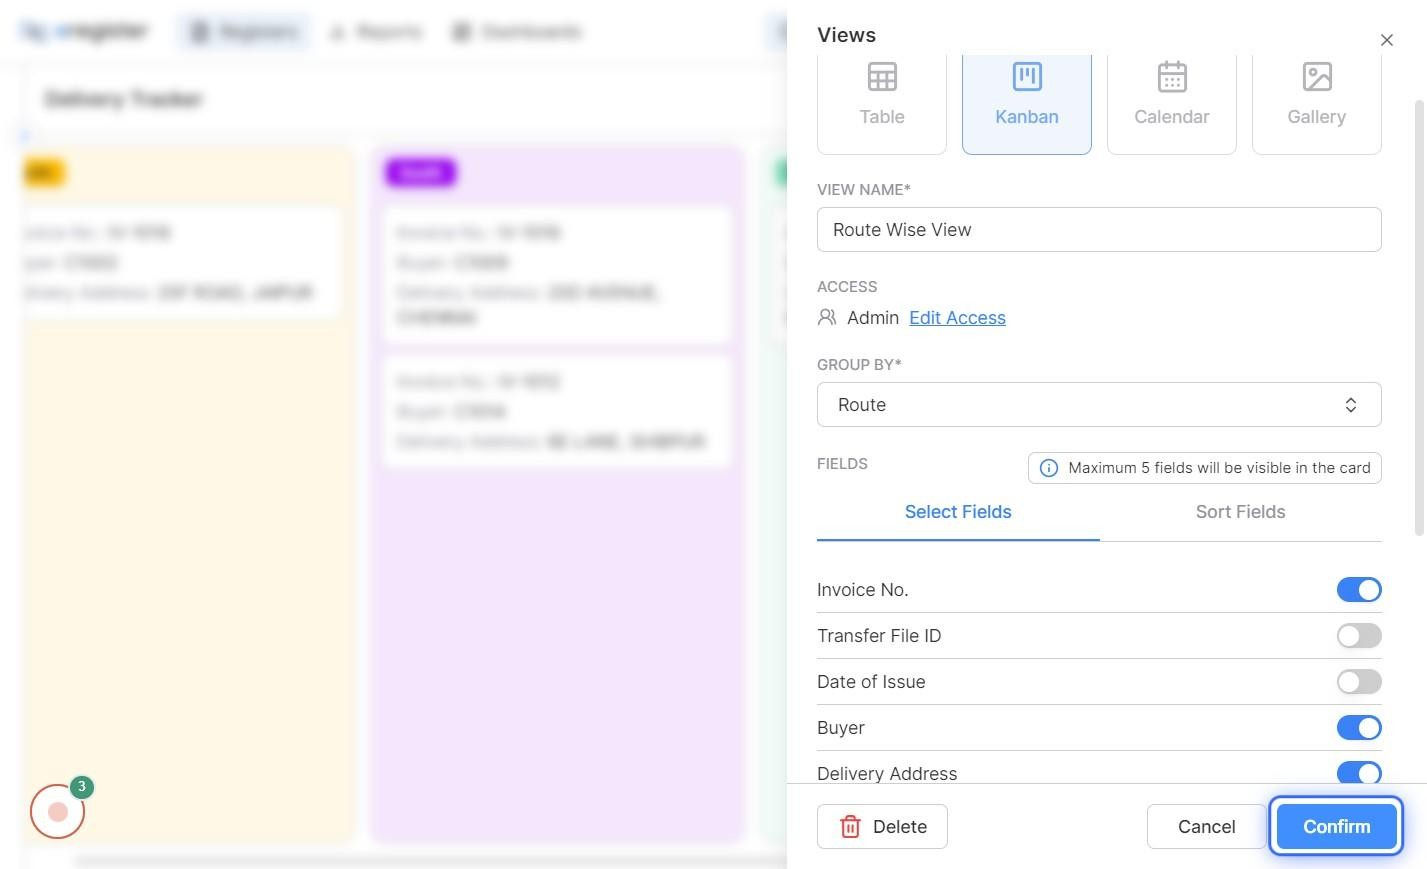
Views
Views within E-Register provide a personalized view of your data. They enable you to highlight the most relevant fields while also allowing you to control the arrangement of fields for both mobile and web interfaces.
E-Register provides four distinct view options for registers: Table view, Kanban view, Gallery view, and Calendar view.

- Table View: This straightforward display presents your data in a simple table format, featuring selected fields for easy reference. Additionally, the table view offers a list view option optimized for mobile devices, ensuring accessibility on the go.
- Kanban View: Embrace a visual, card-based approach with the Kanban view, which organizes entries into different categories based on the user-selected group by field. Each entry is represented by a movable card, facilitating intuitive workflow management.
- Gallery View: Perfect for showcasing visual content, the Gallery View highlights image fields alongside two additional fields, resembling an interactive gallery. This view provides a visually engaging experience while maintaining functionality.
- Calendar View: Visualize your data over time with the Calendar view, which arranges records within a calendar based on the selected date field for grouping. This view offers a comprehensive overview of scheduled tasks, appointments, or events.
In addition to these diverse view options, E-Register empowers you to create and save multiple views, each with its unique set of access permissions. This flexibility allows you to tailor views to specific user roles or preferences, ensuring that everyone interacts with data in a way that best suits their needs.
How to Create a View?
Step 1: Select the register of your choice from the left-hand panel and then click on the Views icon.

Step 2: Click on the 'Add View' button from the dropdown

Step 3: Select View type and enter the View Name and Group By field. Use the toggle buttons to select the fields of your choice to be displayed.
Step 4: Arrange the fields in their order of display using drag and drop in the Sort Fields tab.

Step 5: The view is applied and displayed and can be edited using the given edit icon.

Default View
Every register is equipped with an initial default view, presenting a comprehensive table view with all fields enabled. The default view is available for all users with access to the register.

Users have the option to configure the default view during the register creation process or modify it later using the edit icon, ensuring flexibility in adapting the view to their specific needs.

If you have any further questions regarding the capabilities of views, don't hesitate to contact our support team for assistance. We're here to help you make the most out of E-Register.